
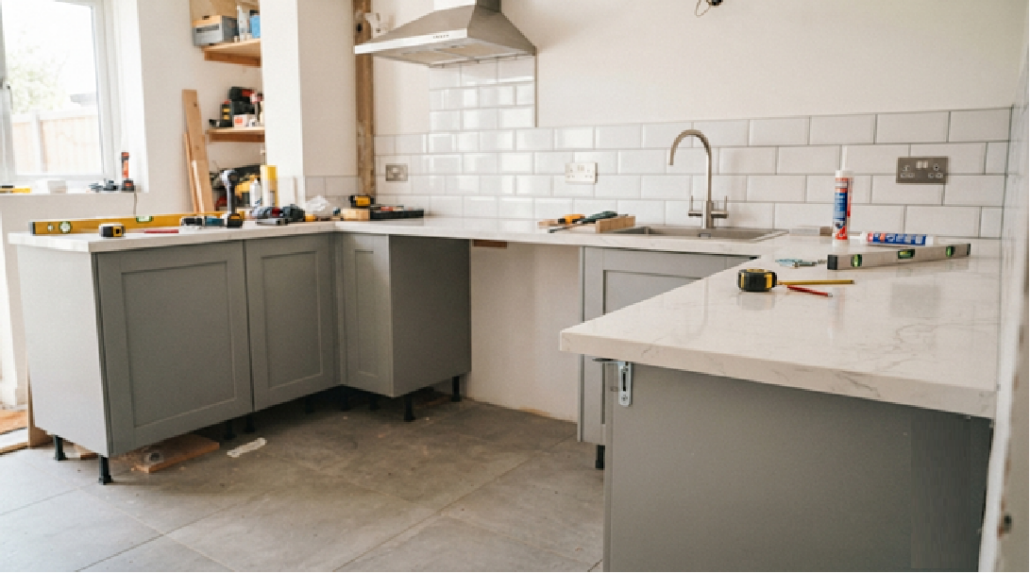
Installing Guides for Kitchen Worktops
Key Takeaways
- Accurate measurements and ensuring base cabinets are completely level are crucial initial steps for a successful installation.
- Checking layouts, planning joint placements away from heat and water, and precise cutting help achieve a professional finish.
- Scribing edges to fit uneven walls and properly sealing exposed chipboard around sinks and hobs prevents moisture damage.
- Properly tightening connector bolts and securing worktops from underneath while accounting for material movement ensures durability.
- Applying a continuous bead of sanitary-grade silicone sealing prevents water ingress, mould growth, and staining.
Installing kitchen worktops is one of the most important stages of a kitchen renovation because the worktop serves as the main surface and preparation countertop at home. The idea behind kitchen worktop installation is that a fully fitted worktop not only adds to the high-end appeal of the kitchen but also improves durability and use. Whether you choose laminate, solid wood, quartz, granite, or compact laminate, correct installation aims to achieve better performance and ensure full maintenance.
How to Install a Kitchen Worktop?
The installation process starts with correct measuring. Every cabinet run should be measured carefully from all angles, and measurements should be double-checked before any cutting takes place.
1] Accurate Measurements:
Walls are rarely perfectly straight, so measurements should be taken at many points to avoid any changes. Standard kitchen worktops include a small overhang beyond the front of the cabinets, but the complete measurement should always follow the manufacturer’s design. Time management and errors should be avoided.
Before keeping the worktop in position, it is important to find out that all base cabinets are aligned at one uniform level. A spirit level should be used across the full length of the cabinets and in both the directions. Any oddness, irregularities, or unevenness should be corrected by altering the cabinet legs. If the cabinets are not level, the worktop may twist or become stressed with the use of heavy components like granite or quartz.
2] Confirming the Layouts and Patterns:
Once the cabinets are levelled, the worktops can be positioned conveniently on top to check the layout. This stage permits the installer to decide where joints will be located and to confirm that patterns and edges are properly shaped. In L-shaped kitchens, joints should be placed away from sinks and hobs because those areas are exposed to water and heat. Planning the layout carefully can revamp the appearance of the kitchen.
Cutting the worktop requires accuracy and correct alignment to detail. Measurements should be transferred onto the worktop using a pencil and straight edge. Laminate worktops are usually cut from the edges to reduce chipping on the visible surface, while wooden countertops are generally cut from the top with a sharp side.
3] No Removal of Extraneous Substances:
Most kitchens have walls that are not perfectly placed in order, so scribing is often important. The worktop is placed against the wall, and any gaps are marked by a tool. The marked line is then carefully cut until the worktop fits against the wall. A well-scribed edge creates a neat, professional appearance and reduces the amount of sealant needed.
Sink and hob openings in kitchen worktop installations should be marked using the manufacturer’s pamphlet. Pilot holes are drilled inside the requisite area, and the opening is made with a cutter or jigsaw. After cutting, all the transparent chipboard edges on laminate worktops must be sealed with a waterproof concealer. This step is very important because moisture entering the exposed core can cause swelling and damage. Even a small unsealed section around a sink cut-out can lead to future problems.
4] Tightening of bolts and machinery parts:
Where two sections of worktop meet, the joint must be assembled carefully. Jointing compound or sealant is applied to the mating surfaces, and connector bolts underneath the worktop are tightened gradually until the surfaces become flush. A straight edge should be used to check alignment before the bolts are fully tightened. Excess sealant should be removed immediately to maintain a clean finish.
The worktop is then positioned to the cabinets from underneath using brackets or screws supplied by the manufacturer. Screws should be tightened firmly but not completely. Solid wood worktops need a small amount of movement because wood naturally expands and contracts with alterations in humidity. Stone worktops are usually fixed with glued pads or silicone.
5] Continuous Sealing:
Sealing is one of the final but most vital stages of installation. A continuous bead of sanitary-grade silicone should be applied where the worktop meets the wall and around sinks, taps, and other penetrations. The sealant should be smoothed neatly to create a waterproof barrier and a clean appearance. Proper sealing helps prevent water ingress, mould growth, and staining.
After installation, the entire worktop should be inspected carefully. All joints should be flush, the surface should be level, and sinks and hobs should be securely supported. Any remaining adhesive or silicone residue should be removed before it cures. The worktop should not be subjected to heavy use until all adhesives and sealants have fully cured according to the manufacturer’s instructions.
6] Using Various Worktop Materials:
Different worktop materials require slightly different methods for kitchen worktop installation. Laminate worktops are relatively easy to fit and are popular for DIY projects, but all open edges must be sealed carefully. Solid wood worktops should be used with oils, and after installation, all the gaps should be covered. Quartz worktops are generally heavy and robust, so installation is suggested.
Many installation issues are caused by avoidable mistakes such as incorrect measurements cutting from the wrong face of a laminate worktop, failing to seal sinks, excessive tightening of screws and joint placement. Avoiding these common errors can increase the life of a worktop and lead to more sustainability.
Conclusion
The art of kitchen worktop installations is a project that demands careful planning, accurate measuring, and attention to detail. The key stages include measuring, levelling cabinets, joint planning, cutting precisely and applying waterproof sealing. While laminate and timber worktops can often be installed successfully by experienced installers, quartz and granite are installed by professionals.

